
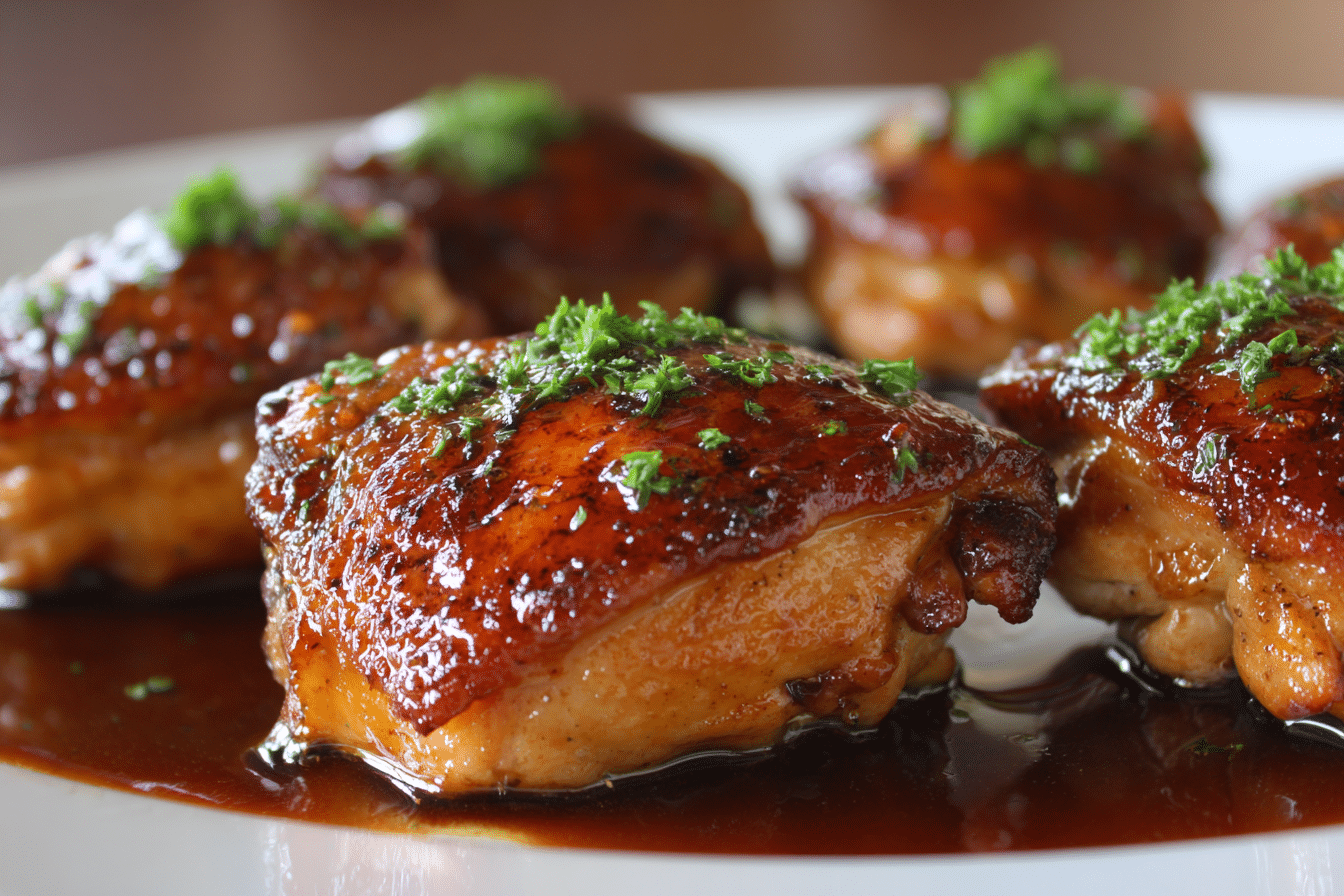
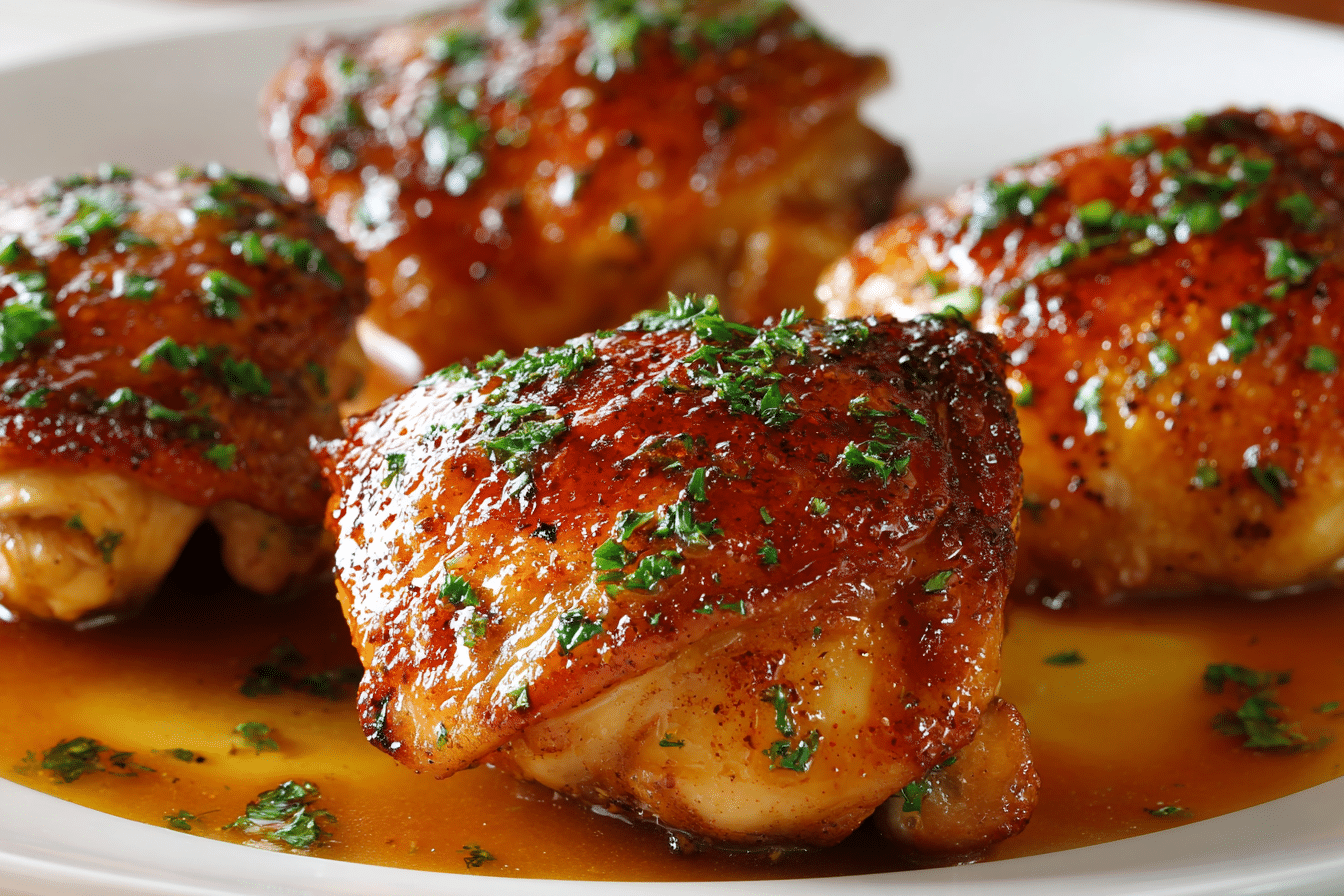
Some of the best meals come from the humblest ingredients—and Honey Garlic Chicken Thighs prove exactly that. With just five pantry staples, this recipe delivers deep flavor, satisfying texture, and a glossy sauce that begs to be spooned over everything on your plate.
In one pan and under an hour, you’ll have golden-browned chicken, drenched in a sticky-sweet glaze enriched with garlic and balanced by soy and vinegar. It’s bold, comforting, and completely doable, even on your busiest evenings. Whether you’re feeding family or just yourself, this dish consistently hits the spot.
What makes it shine is its beautiful simplicity. Chicken thighs are naturally juicy and full of flavor, which means you don’t need much else to create something crave-worthy. With the right balance of sweet, salty, and tangy, this dish delivers a memorable meal with minimal fuss.
Key Ingredients and Their Roles
Chicken Thighs: Opt for bone-in, skin-on for richer flavor and better moisture retention. The skin crisps up nicely in the pan and adds irresistible texture. Boneless versions work too—just reduce cooking time and skip the sear if you’re short on time.
Honey: Acts as both sweetener and glaze thickener. As it simmers, it creates a rich, syrupy coating that clings to the chicken. Go for a neutral honey. Maple syrup can step in if you want something with an earthier taste.
Soy Sauce: Essential for adding salty, umami flavor that balances the sweetness of the honey. You can use regular or low-sodium soy sauce, or swap in tamari for a gluten-free option.
Garlic: Fresh garlic gives this recipe its bold, aromatic heart. Don’t settle for the pre-chopped kind—freshly minced cloves make a noticeable difference in flavor and aroma.
Apple Cider Vinegar: A touch of acidity lifts the entire dish, preventing the glaze from becoming overly sweet. Rice vinegar or white wine vinegar are great substitutes if needed.
Optional garnishes like green onions or sesame seeds give a nice pop of texture and color but aren’t required.
Step-by-Step Cooking Instructions
1. Dry and Season: Pat the chicken dry to help the skin crisp up while cooking. Sprinkle both sides lightly with salt and pepper.
2. Sear the Chicken: Heat a large skillet over medium-high. Place thighs skin-side down and cook for about 7 to 8 minutes without moving them. Once the skin is golden and crisp, flip and cook the other side for another 5 minutes.
3. Drain the Pan: Transfer the chicken to a plate. Pour off most of the fat, leaving just enough to sauté the garlic—about a tablespoon is plenty.
4. Start the Sauce: Lower the heat to medium-low. Add the minced garlic and stir constantly for 30 seconds until fragrant but not browned. Pour in the honey, soy sauce, and vinegar. Stir and let the mixture bubble gently for a few minutes to begin thickening.
5. Return Chicken to Skillet: Place the seared thighs back in, skin-side up. Spoon some of the sauce over each piece. Cover loosely and let simmer for 10–12 minutes until the chicken is fully cooked.
6. Thicken the Glaze: Remove the lid and allow the sauce to reduce for another 3–5 minutes. Spoon the glaze over the chicken as it thickens to help coat it evenly.
7. Finish and Serve: Remove from heat and rest the chicken for a few minutes before serving. Drizzle with remaining glaze and garnish as desired.
Avoid These Pitfalls:
-
Crowding the pan prevents browning—work in batches if needed.
-
Don’t let garlic burn; always lower heat before sautéing it.
-
Avoid boiling the sauce too rapidly, or it may over-reduce and become bitter.
Expert Tips, Customizations & Substitutes
Smart Tips:
-
Dry chicken thoroughly to ensure crisp, golden skin.
-
If the glaze thickens too much, stir in a splash of water to loosen it.
-
Allowing the chicken to rest before serving helps it retain its juices.
Tasty Variations:
-
Add heat with a pinch of chili flakes or a squirt of sriracha.
-
Grated ginger gives the sauce a fresh, spicy kick—add it with the garlic.
-
A squeeze of lemon or lime at the end can brighten the whole dish.
Ingredient Swaps:
-
Substitute maple syrup or agave if you’re out of honey.
-
Boneless chicken thighs or even drumsticks work well.
-
Replace apple cider vinegar with rice vinegar or lemon juice for a similar acidic note.
How to Serve It & Meal Pairing Ideas
Honey Garlic Chicken Thighs are incredibly versatile. Serve them with rice (white, brown, or jasmine) to soak up the glaze. For a cozy twist, pair with creamy mashed potatoes. Stir-fried or roasted vegetables like broccoli, green beans, or carrots make excellent sides.
For a lighter option, serve them over a fresh salad or tucked into lettuce cups for a fun, low-carb meal. The rich glaze also complements noodles or even crusty bread—perfect for wiping up the extra sauce.
These thighs are ideal for weeknights, make-ahead lunches, or even informal get-togethers. They reheat beautifully and taste just as good the next day.
Nutritional Highlights
Chicken thighs provide a healthy dose of protein and iron while being more flavorful than leaner cuts like breasts. The skin and bone help retain moisture, giving you tender meat with minimal added fat.
The glaze is simple and made from real ingredients—nothing artificial or overly processed. The honey adds natural sweetness, garlic boosts flavor without extra calories, and vinegar brings balance.
Pair with fiber-rich grains and steamed vegetables for a meal that feels indulgent yet fits comfortably into everyday eating.
Frequently Asked Questions
1. Can I use skinless chicken?
Yes. Skinless thighs work well, though they won’t have the same crispy texture. You may need to reduce cooking time slightly to avoid overcooking.
2. Can I finish this recipe in the oven?
Absolutely. After searing, transfer the chicken and sauce to an oven-safe dish. Bake at 375°F for 15–20 minutes, basting halfway through.
3. Is this dish freezer-friendly?
It is. Let the chicken cool completely, then store it in an airtight container. Freeze for up to two months and reheat gently on the stove with a splash of water to loosen the glaze.
4. What kind of pan should I use?
A cast-iron or stainless-steel skillet is best for searing and caramelizing the sauce. Avoid non-stick pans—they don’t produce the same deep browning.
5. Can I double the sauce?
Yes! Just increase all the sauce ingredients proportionally. Simmer a little longer so the glaze still thickens properly.
6. How do I check if the chicken is cooked through?
Use a meat thermometer. Chicken is done when the internal temperature reaches 165°F. The juices should run clear, and the meat should not be pink near the bone.
7. Can I cook vegetables in the same pan?
Definitely. Add firm veggies like carrots, bell peppers, or snow peas during the last 8–10 minutes of simmering. They’ll soak up the sauce and become tender without turning mushy.
Juicy chicken thighs in a sweet-savory honey garlic glaze. Made with just five ingredients and ready in under an hour, this dish is full of bold flavor and easy enough for any night of the week.
- Prep Time: 15 minutes
- Cook Time: 15 minutes
- Total Time: 30 minutes
- Yield: 6 servings 1x
Ingredients
6 bone-in, skin-on chicken thighs
1/3 cup honey
1/4 cup soy sauce
4 garlic cloves, minced
1 tablespoon apple cider vinegar
Salt and pepper, to taste
Optional: sesame seeds, chopped scallions
Instructions
-
Pat chicken dry and season with salt and pepper.
-
Heat a skillet over medium-high. Sear skin-side down for 7–8 minutes. Flip and cook another 5 minutes.
-
Remove chicken and discard most fat, leaving about 1 tbsp in the pan.
-
Lower heat. Sauté garlic for 30 seconds. Add honey, soy sauce, and vinegar. Simmer 2–3 minutes.
-
Return chicken to pan, skin-side up. Cover and simmer 10–12 minutes.
-
Uncover and cook 3–5 more minutes, spooning sauce over thighs.
-
Rest chicken before serving. Garnish if desired.